Turning a stack of pictures into one PDF takes under a minute once the files are loaded. The part that decides whether the result is any good happens before and after that minute: which images you pick, what order they go in, what kind of page they sit on, and whether you look at the output before sending it to someone. This walkthrough follows that sequence using the Image to PDF tool on this site.
Step 1: Decide what the PDF is for
The same set of images can become very different documents depending on where it is going.
- Something to print. Page size and margins matter most. You want a standard sheet and images that are not stretched.
- Something to read on a screen. Order and legibility matter most. Page size is secondary.
- A form or application upload. The receiving site may have a file size cap or a page limit, so you want few images and nothing extra.
- An archive of paper records. You want to keep as much of the original detail as possible.
One sentence of purpose, written down or just held in your head, makes every later choice easier.
Step 2: Prepare the images
A PDF cannot be sharper than the pictures that go into it. A few minutes of preparation saves repeated attempts.
Check each image at full size. Open it and look for blur, a thumb over the corner, glare on glossy paper or text that is cut off at the edge. Retake it now rather than discovering the problem on page six of a finished file.
Rename files so they sort sensibly. If you are about to select twelve photos from a folder, names such as page-01.jpg, page-02.jpg and so on keep them in order when you add them together. Camera names like IMG_4821.jpg usually sort in the order you shot them, but not always, especially after copying between devices.
Think about resolution. A modern phone photo can be several megabytes. That is fine for one or two pages, but twenty of them add up. The tool accepts up to 50 images, 50 MB each and 200 MB in total. If a file is near the limit, or the final PDF needs to stay small, use a lower-resolution version of the photo before you convert. The conversion tools do not compress images for you, so the size you put in is, roughly, the size you get out; the separate Compress PDF tool can shrink the finished PDF afterwards, with limits. The article on reducing PDF file size covers this trade-off in more detail.
Crop and straighten beforehand if you can. The tool never crops. It scales each image to fit inside the page, so a tilted photo with a lot of table around the paper will produce a tilted page with a lot of table. Your phone's photo editor can crop in seconds.
Step 3: Add the files and set the order
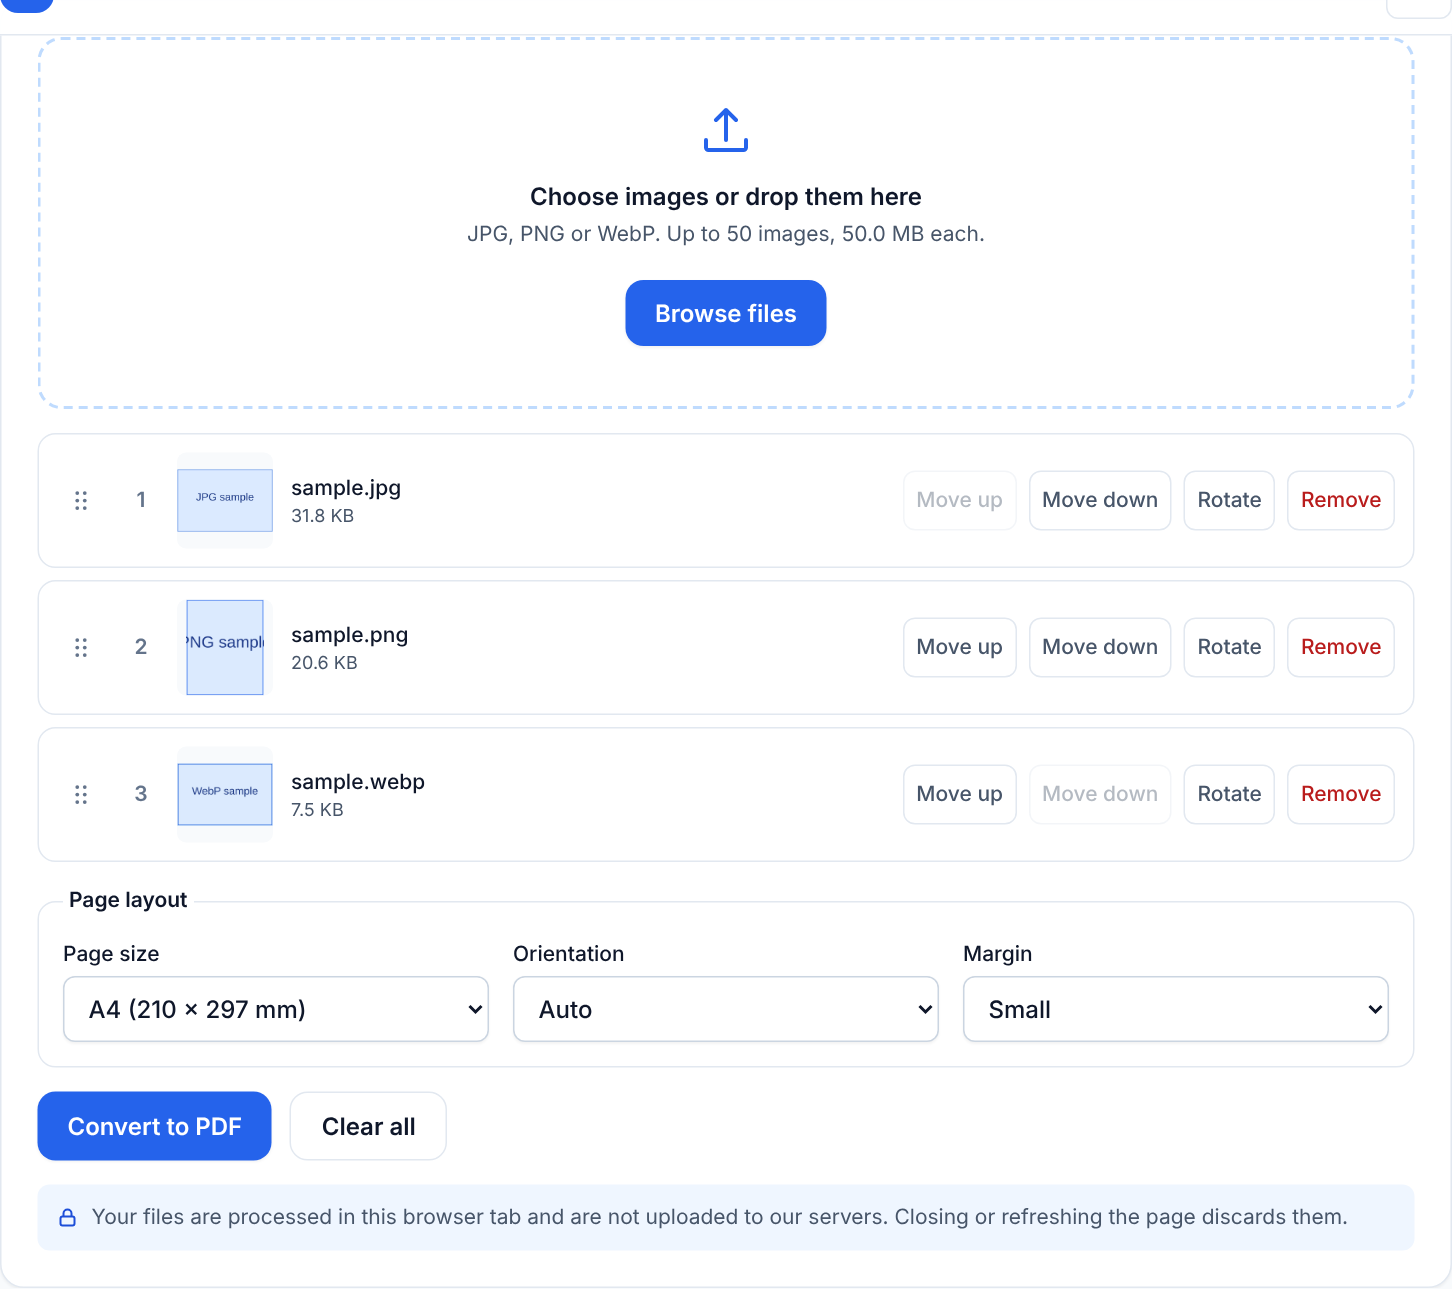
Drag your images onto the drop area or use the file picker. JPG, JPEG, PNG and WebP are accepted. Each file appears in a list in the order it was added.
Now check the order carefully. You can drag items up and down, or use the move buttons, and you can remove any image you added by mistake. Page order is the single most common thing to get wrong, and it is easy to correct here and annoying to correct later. For a multi-page document, read the list from top to bottom as if you were turning pages. For a more general discussion of sequencing, see page ordering and rotation tips.
A practical habit: if you are converting a scanned form, put the signature or attachment page last and confirm it is last, because that is the page the recipient will look for first.
Step 4: Choose page size, orientation and margin
This is where most of the visible differences come from. The tool offers three page size choices.
| Option | Page result | Best for |
|---|---|---|
| A4 | 210 x 297 mm, about 595 x 842 pt | Documents going to most countries outside North America |
| US Letter | 8.5 x 11 in (215.9 x 279.4 mm) | Documents going to the US, Canada and some neighbours |
| Fit to image | Each page takes the shape of its image | Screen reading, archives, mixed shapes |
Orientation can be automatic, portrait or landscape. In automatic mode, a wide image gets a landscape page and a tall one gets a portrait page, which is usually what you want for a mixed set. If every image is a portrait photo of a sheet of paper, forcing portrait keeps the whole document consistent.
Margin can be none, small or medium. No margin fills the page edge to edge as far as the image shape allows. A small or medium margin leaves white space around the picture, which looks tidier when printed because many printers cannot print right to the paper edge.
Whatever the page size, the image is scaled to fit inside the page and centred. It is not stretched and not cropped. That means an A4 page holding a square picture will have empty bands at the top and bottom or at the sides. If those bands bother you, either choose "fit to image" or crop the picture to the proportions of the page first. If you are unsure which paper size is right, this explanation of A4 and US Letter goes through the differences.
Step 5: Mixed formats and mixed shapes
You can combine JPG, PNG and WebP in one run. Typical examples are phone photos (JPG) plus a screenshot of a confirmation email (PNG) plus an image saved from a website (often WebP). There is no need to convert them to a single format first.
What happens to each one is worth knowing:
- JPEG files are embedded using their original JPEG data, so they are not re-compressed. The exception is a photo that carries an EXIF rotation flag, which is common with phone pictures taken in portrait. Those are redrawn upright and saved again as JPEG at quality 0.92, which is slightly lossy but rarely noticeable.
- PNG files are embedded losslessly. If a PNG has transparent areas, the transparency is kept and shows against a white page.
- WebP files are decoded by your browser and embedded as PNG. The pixels are preserved, but the PDF may end up larger than the original WebP.
With mixed shapes, choose automatic orientation, or "fit to image" if you do not want any white bands at all. For the reasoning behind the format behaviour, see JPG vs PNG for PDF.
Step 6: Create the PDF and check it
Press the convert button and download the result. Then open the file in whatever viewer you normally use and run through a short checklist:
- Page count. It should equal the number of images you left in the list.
- Order. Scroll from first page to last.
- Orientation. No page should be sideways or upside down. If a photo appears rotated, the usual cause is a source image that was saved without a rotation flag. Use the image's Rotate control (90-degree steps) and check the preview, or fix it in a photo editor and convert again. The tool cannot rotate pages after the PDF has been created.
- Legibility. Zoom to 100 percent on a page with small print and make sure it can be read.
- Edges. Make sure nothing important was already cut off in the original photo.
- File size. If the file needs to go through an email limit or an upload form, check it now.
What the tool does and does not do
It runs in your browser, so the images are processed on your device rather than being uploaded by these tools. You get one PDF with one image per page, in the order you chose, at the page size you chose.
It does not recognise text (there is no OCR), so the resulting PDF is made of pictures and you cannot search or select words in it. It does not compress, rotate pages after the PDF is created, add passwords, edit, watermark or sign. It also cannot put several images on one page. If you need to combine the result with other documents, use Merge PDF next. Very large batches can fail on phones or older computers with limited memory, and in that case the tool shows an error rather than crashing, so splitting the job into two smaller PDFs is a reasonable workaround.
Next steps
- Open Image to PDF and convert your files using the checklist above.
- If every image is a JPEG photo or a phone scan, JPG to PDF is built for that case and accepts up to 50 photos.
- For a deeper tour of the options, read the Image to PDF guide.
- If you are photographing paper, scanning documents with your phone has capture tips that make the PDF cleaner.