This guide is organised around jobs you want to get done. Start with the decision section to pick a tool, then jump to the walkthrough closest to your situation. The option reference near the end explains every setting in plain language, and the limits section lists exactly what each tool accepts.
Decide first: which tool do I need?
There are two image tools on this site, and they overlap on purpose.
- Image to PDF accepts JPG/JPEG, PNG and WebP. It is the general choice when your pictures come in mixed formats.
- JPG to PDF accepts JPG/JPEG only, and is tuned for phone photos and camera scans of paper, with Fit to image pages and no margin as its defaults.
| If you have... | Use | Why |
|---|---|---|
| Only JPEG photos, up to 50 | JPG to PDF | Defaults tuned for photos, and the tool only accepts JPEG |
| A mix of JPG and PNG | Image to PDF | JPG to PDF will not accept PNG |
| Screenshots (usually PNG) | Image to PDF | PNG support, transparency handled |
| WebP images saved from a website | Image to PDF | Only tool that accepts WebP |
| 35 phone photos of a document | Either | Both accept up to 50 files; JPG to PDF defaults to Fit to image and no margin, which suits scans |
| You want landscape/portrait control | Either | Both offer an orientation option when the page size is A4 or Letter |
| You want pages that match each image | Either | Both call it "Fit to image"; it is the default in JPG to PDF |
If you are unsure what kind of file you hold, check the extension: .jpg or .jpeg means JPEG; .png is PNG; .webp is WebP. Photos from phones are usually JPEG, though some phones save HEIC, which neither tool accepts. Change the camera format to "most compatible" or share the picture in a way that converts it to JPEG first.
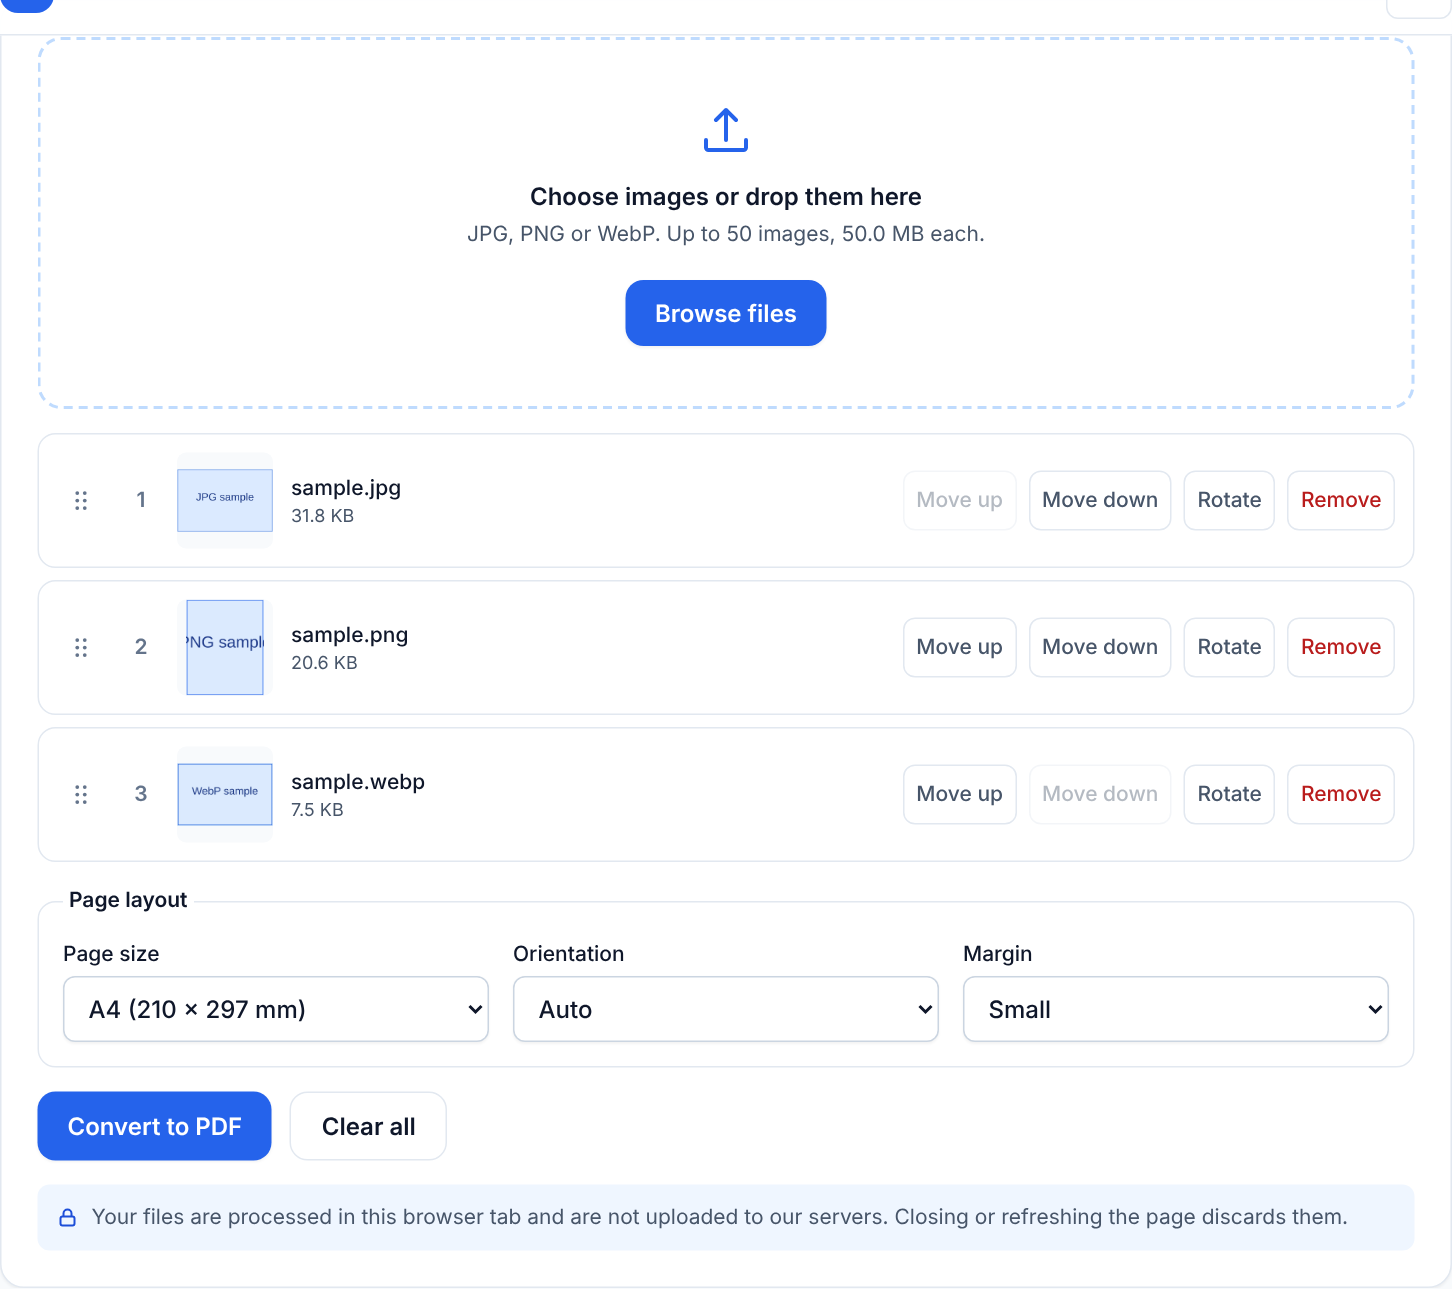
Walkthrough 1: Photograph paper documents and email one PDF
Goal: a tidy multi-page PDF from phone photos of a form or contract.
- Photograph each page flat, in good light, with the page filling the frame. The scan documents with your phone article has tips on lighting and shadows.
- Open JPG to PDF and add the photos.
- Check the order of the thumbnails; drag to fix it.
- Choose A4 or US Letter to match your paper if you may print, or "Fit to image" if it is for screen only.
- Pick a small margin so printing does not clip the edges.
- Create and download the PDF.
Expect: one photo per page. Because the original JPEG data is embedded unchanged, the picture is not recompressed, so the PDF size is close to the combined size of the photos. If the result is too large to email, try smaller photos next time, as covered in reduce PDF file size tips.
Walkthrough 2: Combine screenshots into a landscape handout
Goal: ten screenshots from a presentation, each on its own landscape page.
- Open Image to PDF and add the PNG screenshots.
- Set page size to "fit to image" if the handout is for reading on screen. Pages will match each screenshot exactly, with no white bars.
- If you plan to print, choose A4 or Letter with orientation set to Landscape, so each page keeps a consistent shape.
- Margin: none for fit to image, small for print.
- Create the PDF.
PNG transparency, if any, appears over a white page. Screenshots are normally opaque, so you are unlikely to notice.
Walkthrough 3: Mixed batch of receipts for expenses
Goal: one PDF with portrait receipts and one landscape confirmation page.
- Add all images to Image to PDF.
- Choose A4 or Letter, orientation Auto. Each page follows its image shape.
- Reorder by date using drag and drop, or the move buttons if you are on a touch screen where dragging is fiddly.
- Remove any duplicates with the remove control.
- Create and download.
Because orientation is chosen per image under Auto, the landscape page will be wide while the receipts remain tall.
Walkthrough 4: One logo or diagram on a clean page
Goal: a single PNG graphic on a standard page.
- Add the one image.
- Choose A4 or Letter and a medium margin for breathing room.
- The image is scaled to fit inside the page and centred. It is never stretched out of proportion and never cropped.
If the graphic is small in pixels, it will be enlarged to fill the available area and may look soft when printed. A larger source image gives a crisper page.
Option reference
Page size
- A4: 210 x 297 mm, standard in most of the world.
- US Letter: 8.5 x 11 in, standard in the US and Canada.
- Fit to image: each page takes the shape of its own image. It is the default in JPG to PDF, while Image to PDF defaults to A4.
For the numbers and print-scaling problems behind these choices, read A4 vs Letter page size and orientation.
Orientation (Image to PDF only)
- Auto: portrait or landscape per image, depending on its shape.
- Portrait / Landscape: forces every page the same way. The image is still scaled to fit, so a landscape photo on a portrait page will be smaller with white above and below.
The orientation option applies only to A4 and US Letter, and it is switched off when Fit to image is selected because each page already follows its picture.
Margin
- None: content reaches the page edge. Fine on screen; printers may clip it.
- Small: thin frame, good default for printing.
- Medium: wider frame, good for presentation or binding.
Order and removal
Images appear as a list. Drag to reorder, or use the move buttons. Remove deletes an image from the list before creating the PDF. The page order in the PDF matches the list from top to bottom.
What happens to your image data
- JPEG: embedded as the original data, with no re-compression, which keeps the file from degrading. The exception is a JPEG with an EXIF rotation flag. Phones often store a photo sideways and add a flag saying "display rotated". To make sure the page appears upright, such photos are redrawn the right way up and re-encoded as JPEG at quality 0.92. That is a slight, deliberate loss of quality for those files only.
- PNG: lossless; transparency is kept, shown on a white page.
- WebP: decoded by your browser and embedded as PNG. Pixels are preserved, but the PDF can be larger than the WebP was.
For the trade-offs between JPEG and PNG for scanned documents, see JPG vs PNG for PDF.
All of this happens in your browser; the images are not uploaded by these tools.
Limits at a glance
| Image to PDF | JPG to PDF | |
|---|---|---|
| Accepted types | JPG/JPEG, PNG, WebP | JPG/JPEG only (checked by signature) |
| Maximum images | 50 | 50 |
| Per-image size | 50 MB | 50 MB |
| Total size | 200 MB | 200 MB |
| Page size | A4 (default), US Letter, fit to image | A4, US Letter, fit to image (default) |
| Orientation option | Auto, portrait, landscape | Auto, portrait, landscape |
| Margin | None, small (default), medium | None (default), small, medium |
| Output | One PDF, one image per page | One PDF, one image per page |
JPG to PDF checks the file signature, not just the extension, so a PNG renamed to .jpg is refused. If a batch is rejected, see fix common PDF errors.
Things these tools do not do
- No cropping or editing of colours. Rotation is limited to 90-degree steps per image.
- No text recognition (OCR), so the PDF contains pictures of text, not selectable text.
- No compression control for the finished PDF.
If a photo is the wrong way up and it has no EXIF flag, use its Rotate control, or turn it upright in a photo app before adding it. For ordering advice, see page ordering and rotation tips.
Quick troubleshooting
- Photos not accepted: check they are JPEG, PNG or WebP (HEIC is not supported).
- Over the limit: split the batch in two, make two PDFs, and combine them with Merge PDF.
- Sideways page: use the image's Rotate control, or rotate the original in a photo app and add it again.
- PDF too large: use lower-resolution photos or fewer images per file.
- Phone slows down or fails: convert fewer images at a time and close other tabs.
Next steps
- Convert a mixed set with Image to PDF or a set of phone photos with JPG to PDF.
- Combine several resulting PDFs using the merge guide.
- For a broader walkthrough, read how to convert images to PDF.